Harnessing the power of the sun to generate electricity through a DIY solar system is an environmentally friendly and cost-effective way to reduce your reliance on traditional energy sources. However, setting up a solar system can seem daunting, especially when it comes to the wiring aspect. In this guide, we will break down the basics of wiring your DIY solar system to help you navigate through the process smoothly and efficiently.
Understanding the Components
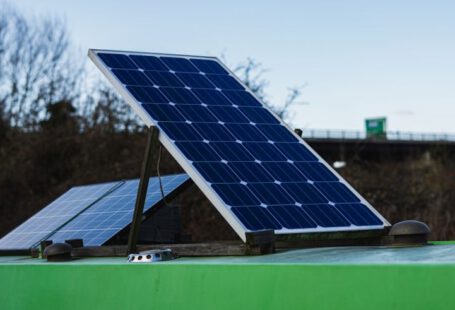
Before delving into the wiring process, it is essential to familiarize yourself with the key components of a solar system. These components include solar panels, charge controller, batteries, inverter, and wiring. Solar panels are responsible for converting sunlight into electricity, while the charge controller regulates the flow of electricity from the panels to the batteries. Batteries store the electricity generated by the panels, and the inverter converts the stored electricity into a usable form for your appliances. Proper wiring ensures that all components are connected correctly to form a functional solar system.
Choosing the Right Wire
Selecting the appropriate wire for your DIY solar system is crucial to ensure optimal performance and safety. The wire gauge, which determines the wire’s thickness and ability to handle the current flow, is a critical factor to consider. The wire gauge you choose will depend on the distance between the components and the amount of current your system will produce. Thicker wires with lower gauge numbers are suitable for longer distances and higher currents, while thinner wires are ideal for shorter distances and lower currents. It is recommended to use copper wires for their conductivity and durability in outdoor environments.
Series vs. Parallel Wiring
When connecting multiple solar panels in a DIY solar system, you have the option to wire them in either series or parallel configuration. Series wiring involves connecting the positive terminal of one panel to the negative terminal of the next panel, increasing the voltage output while maintaining the current. Parallel wiring, on the other hand, connects all the positive terminals together and all the negative terminals together, maintaining the voltage while increasing the current. The choice between series and parallel wiring depends on your system’s voltage and current requirements.
Proper Connection Techniques
Ensuring proper connection techniques is essential to the functionality and safety of your DIY solar system. When connecting wires, use appropriate connectors such as MC4 connectors for solar panels and ring terminals for batteries. It is crucial to follow the manufacturer’s guidelines for connecting each component to prevent short circuits and electrical hazards. Secure all connections with waterproof enclosures to protect them from environmental elements. Additionally, label all wires and components to facilitate troubleshooting and maintenance in the future.
Grounding and Safety Measures
Grounding your DIY solar system is a critical safety measure to protect against electrical faults and lightning strikes. Proper grounding involves connecting all metal components of the system to a grounding rod buried in the earth. This ensures that any excess electrical current is safely discharged into the ground, preventing damage to the system and reducing the risk of electric shock. Implementing safety measures such as using insulated tools, wearing protective gear, and following electrical codes and regulations is essential to prevent accidents during the installation process.
Maintenance and Monitoring
Once your DIY solar system is up and running, regular maintenance and monitoring are necessary to ensure its longevity and efficiency. Check the wiring connections periodically for signs of wear or damage and replace any faulty components immediately. Monitor the system’s performance using a charge controller or a monitoring device to track energy production and battery status. Cleaning the solar panels regularly to remove dirt and debris will help optimize their efficiency and prolong their lifespan.
In conclusion, wiring your DIY solar system requires careful planning, proper equipment, and adherence to safety guidelines. By understanding the components, choosing the right wire, configuring the wiring setup, and implementing safety measures, you can successfully set up a functional and reliable solar system for your home. Regular maintenance and monitoring will help you maximize the system’s performance and reap the benefits of sustainable energy consumption.